I have 128, round 7mm Chez Delaney plates that I want to organize in a folder type holder. Thus far, I have found one place that sells 7mm plate holders-
here on Aliexpress. They are side loaders. I almost pulled the trigger on purchasing, but decided to make my own because I think top loaders would be better.
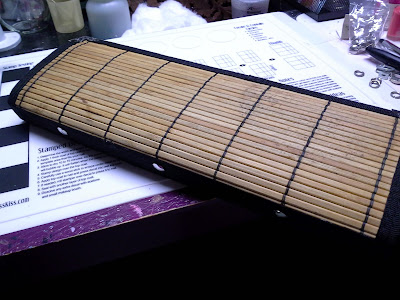
Finished plate holder;
My initial idea was to use upholstery to cover my plates, but switched to re-purposing an old bamboo placemat.
Supplies; 6 pocket picture protectors (leftovers from organizing my husband's family photos...purchased
here), 1/2" screw posts from Hobby Lobby (in the leather section...they also carry 1/4" screw posts- great for repairing your existing folders!), sewing machine (you could hand sew), spring steel lacing bones (from my corsetmaking stash...can be purchased
here...plastic washers would be a good substitute), polyester thread (is best), choice of cover, awl, leather hole puncher, glue (E6000), drill.
Tips:( I sewed my pockets 7mm.) Use the finest needle you can. Loosen both the needle and bobbin tension. Use the largest stitch on your machine. You want to keep the stitch holes small and spaced far enough away from eachother with enough "give" to allow reaching into the pocket to remove a plate without it ripping like perforated plastic.
Moving on...The wide channel between the picture pockets will be the fold line...where the screw posts will be installed. Each page of the finished folder will have 6 plates, back to back...vertical.
The lacing bone will be running down the center channel between pockets. The screw post fits perfect through the holes...I used 3. Assembly goes like this-bone (or washers), upholstery, photo pages, bone...all held by 3 screw posts.) The lacing bone will add stability in addition to keeping the pages from ripping away from the screw posts.
It was at the above point when I realized that I didn't need a cover at all, and maybe using the upholstery I had in mind would be time consuming. It's embroidered, so I'd have to finish all my edges. Then I saw the placemat.
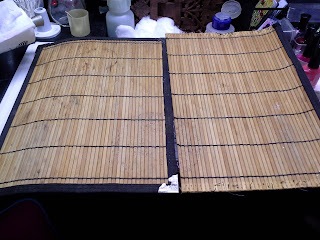
Shown already cut, binding pirated and re-worked (glued) on the new edge. Bonus- the binding is nylon...the edges can be burned with a lighter to seal. Drilled 3 holes through the placemat for screw posts. Also, I glued that last leftover bit to cover the spine (over the lacing bone) of my holder, and used a red hot awl to burn a hole where the screw post goes.
Above, awl is on the left. On right is a leather hole puncher, and what I used to make holes through the picture sleeves. Below- inside assembly.
Below are metal, decorative corners I found while shopping for the screw posts at Hobby Lobby. 3 sets of 4 in a burnished finish-silver, brass and copper. I used the silver...Although a bit expensive, I think they add a finished look to my new holder.
Below is a pic with the embroidered upholstery I almost used.


